

Step 1 - Checking Battery
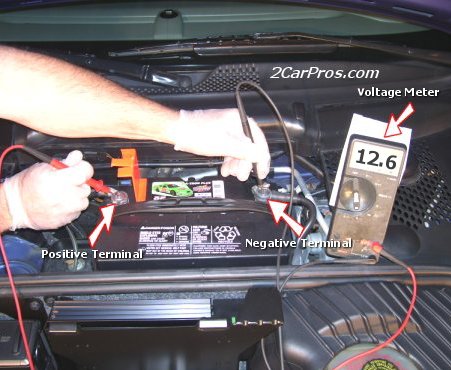
To check a battery surface voltage, remove the positive terminal protective cover. Connect the +positive side meter lead (red) to the positive side battery terminal. Connect the - negative (black) side meter lead to the negative battery terminal. With the vehicle not running and the car sitting over night the battery voltage should be between 12.5 and 12.8 volts.
Step 2 - Identify Alternator

The alternator is rotated by a drive belt driven by the vehicles engine while it is running. Electrical voltage and amperage are generated to recharge the battery and supply voltage to the electrical system of the car. The alternator is held in place with mounting bolts. There is a main electrical wire on the rear of the alternator that supplies voltage to a main voltage junction box. If your alternator is not charging properly, your battery will slowly drain down from operating all the electrical systems in your car and stop the car from running.
Step 3 - Checking Alternator Output
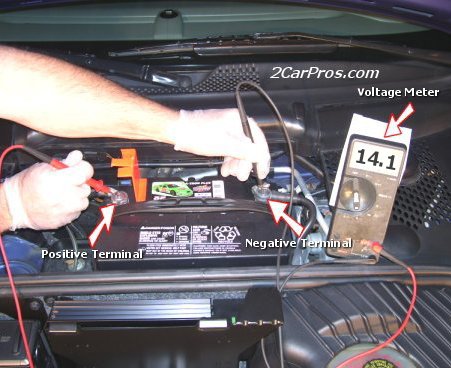
Connect the voltage meter lead the same way you would in a battery static voltage check, Start engine (do not drive) at engine idle the voltage should be between 13.6 to 14.3 volts. If not the alternator may need replacing.
Step 4 - Checking Alternator Amperage Output
Testing the amperage output of the alternator is good for measuring the amount (not the level) of voltage the alternator can produce. This test can be tricky because if the alternator is weak it can still show it as producing amperage. Which is good, but if the voltage is low, it will still allow the battery to go dead. To check the amperage output of an alternator an amp meter is needed. Once the meter is connected start the engine. Next turn on all electrical accessories and raise the engine idle to about 1200 RPM. The alternator should output the max amperage it was designed to produce. Example: a 90 amp alternator should output about 88 amps. Note: An alternator cannot sustain maximum output for long periods of time. If the alternator is forced to operate at maximum output it will overheat and fail. An alternator is designed to operate at max amperage output only for a reasonable amount of time.
Common Problems:
1. Alternator stops producing electrical power and the car stops because the battery dies.
2. Battery fails do to age or defect.
3. Battery cables become loose causing the electrical system to fail.
WARNING! Always wear protective eyewear, gloves and necessary clothing before inspection or work begins. Never crank an engine over when you are near the battery or engine. A battery is filled with explosive gasses that can ignite when extreme heat or a spark is present. A battery could have residual acid on the outside casing so use caution when handling a battery and the surrounding area. Use baking soda to neutralize any suspected acid residue before work begins.


![[Valid RSS]](http://www.5z5.com/Themes/Default/images/valid-rss.png "Validate my RSS feed")
![[Valid Atom 1.0]](http://www.5z5.com/Themes/Default/images/valid-atom.png "Validate my Atom 1.0 feed")
![[OPML checked by validator.opml.org.]](http://www.5z5.com/Themes/Default/images/valid-opml.png "OPML checked by validator.opml.org.")


No comments:
Post a Comment